How do I tell if there is mold in my wall?
Mold growth is a concern that can silently wreak havoc within the walls of our homes. Detecting mold within walls can be a challenging endeavor, as its concealed nature makes it hard to identify without invasive measures. In this article, we'll explore the complexities of identifying mold within walls and provide insights on how to infer its potential presence.
Understanding the Challenge
Mold thrives in damp environments, and walls are enclosed! This makes identifying its presence within walls a daunting task. Here’s a spoiler alert: Definitive confirmation on mold in walls typically requires removing a portion of the wall. There isn’t a great way otherwise to know for sure if there is mold in a wall. However, there are several indicators that can help you make informed inferences about potential mold growth. Below are some key elements to determining if mold could be in your walls.
Moisture Sources
Mold's best friend is moisture. To infer mold presence, start by investigating the sources of moisture. If you can determine why moisture would be in the wall in the first place, you can determine the likelihood that it exists. Faulty windows, roof leaks, or even an overenthusiastic sprinkler outside of the home can introduce the damp conditions conducive to mold growth. The bonus side is that addressing the sources of moisture can also help to prevent mold from growing again, once remediated.
Roofs should be designed to shed moisture away from the building. Instead, this roof slopes into a wall, causing moisture to build up inside of the wall.
This house is in hot/humid Florida, where wallpaper is discouraged on exterior-facing walls since they trap moisture that enters the building due to vapor pressure differences.
Condensation due to poor insulation in the windows and a defective HVAC system.
Visible Signs
You may not be able to see mold in a wall directly, but keep a vigilant eye out for visible signs that may indicate moisture-related problems. Stains, warping, and swelling of walls, baseboards, or nearby floors can be red flags.
If you have carpet, try pulling up the carpet to see if there is mold growth or water damage on the tack strips. Check the nails in the tack strip for rusting.
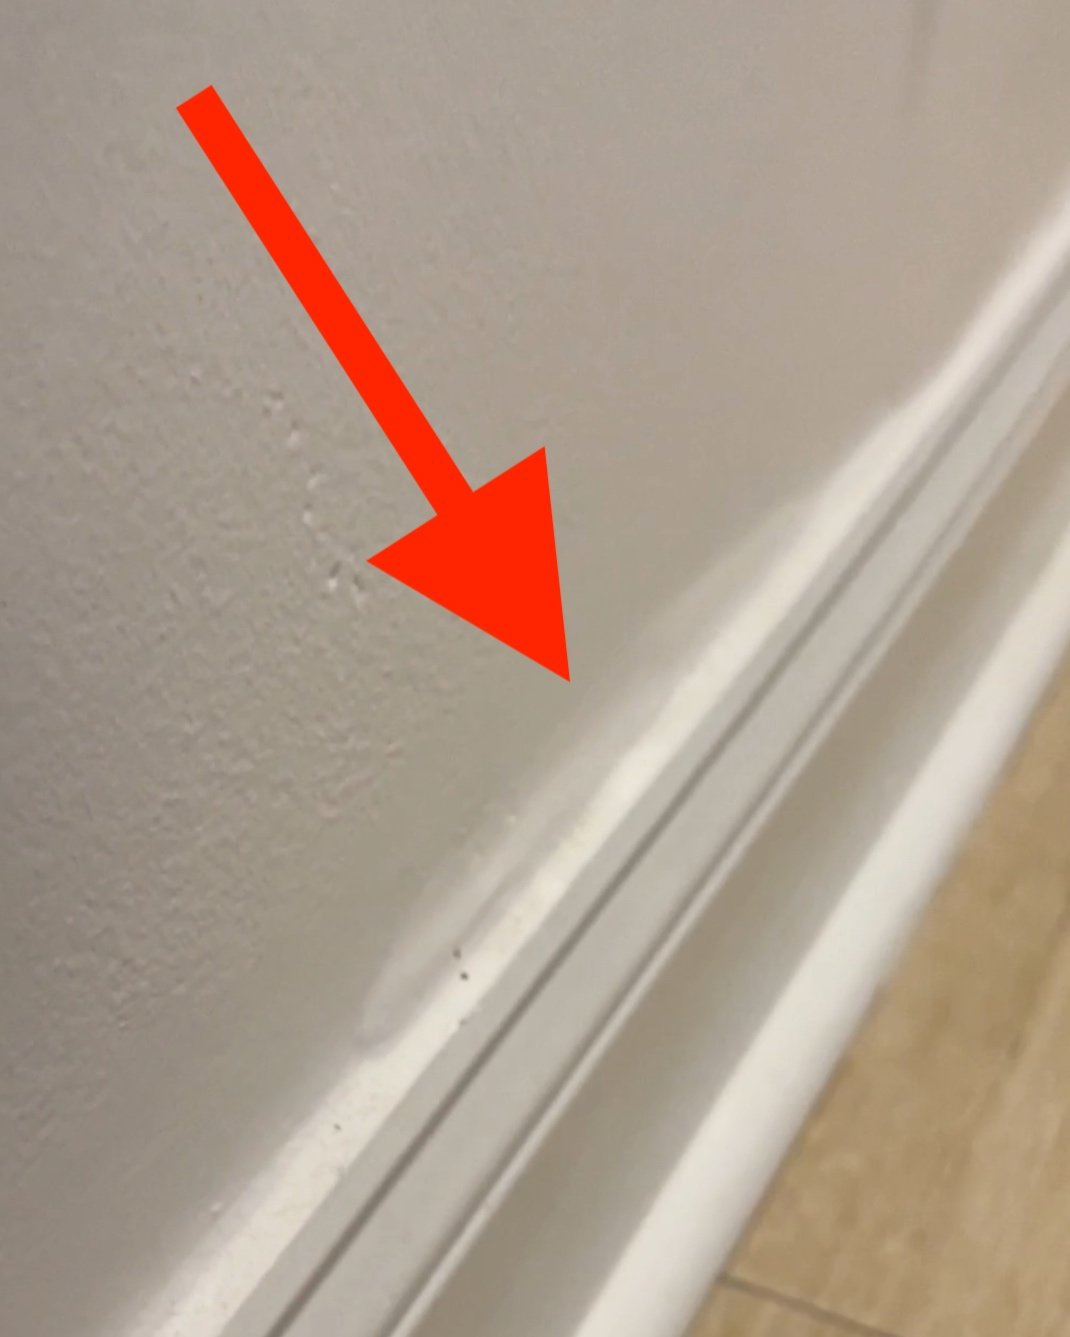
Even more subtle indications like paint bubbles and peeling might point to trapped moisture. Remember, these signs aren't to be taken lightly, as they could be early signs of mold growth.
Paint bubbling at baseboards
Paint bubbling on wall (Two pinholes show where the moisture meter was inserted for testing.)
Water staining around a window
Using Your Senses
Mold often carries a distinct, musty odor. Use your nose to detect any unpleasant moldy smells, especially near outlets or light switches, which can act as air pathways between the wall cavity and living space for odors. Although I don’t recommend it, when I’m on mold investigations, I will put my nose right up to an outlet and get a little sniff. Every now and then, I get knocked on my butt with an amazingly strong musty odor that wasn’t observed from the room.
Additionally, don't underestimate the power of touch. Walls that feel soft or brittle might be or might have been saturated with moisture.
Moisture Meters and Thermal Imaging
Moisture meters are handy tools that can measure the presence of moisture within walls. However, while they can provide useful insights, it's important to exercise caution. Certain materials like metal can give false positive readings. High moisture levels detected by a meter can indicate the potential for mold growth, but they don't always provide concrete evidence.
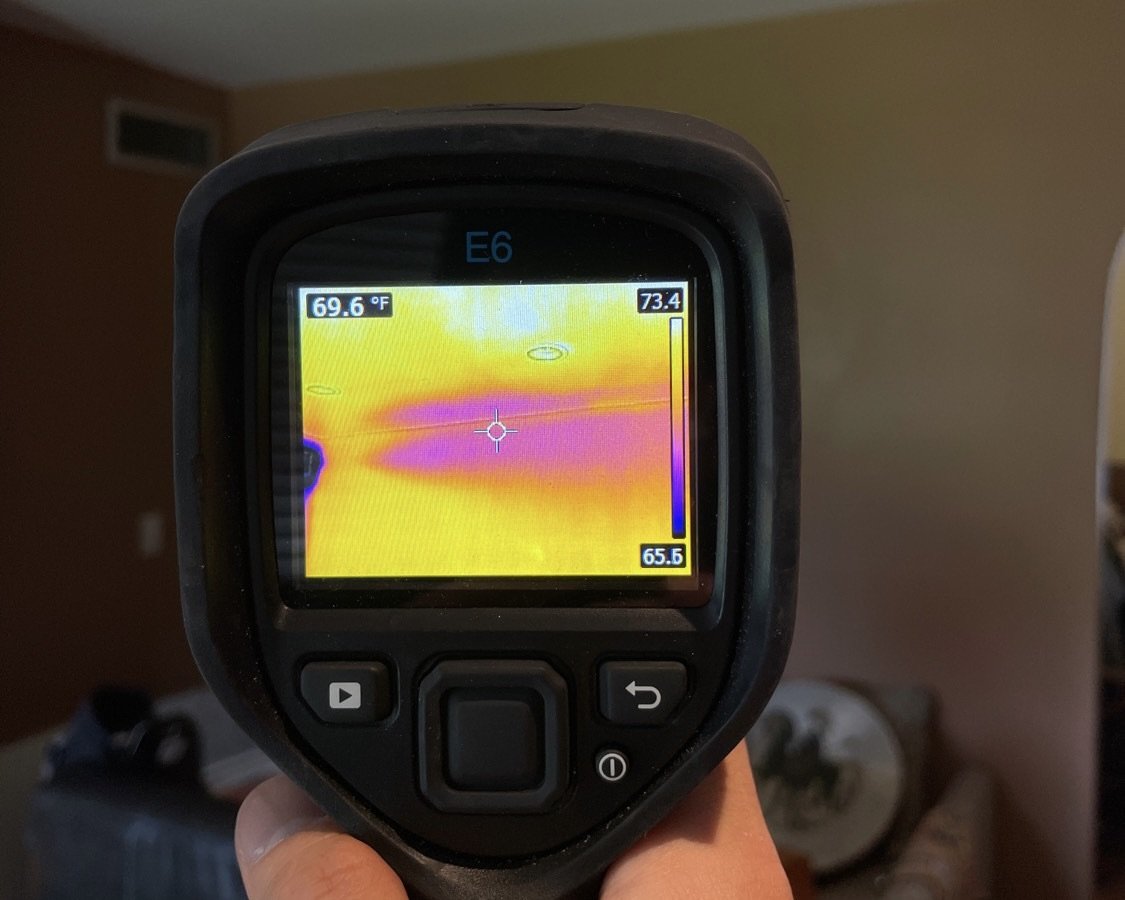
Thermal imaging devices can also be useful, but again, with limitations. Infrared can only pick up moisture because of an effect called evaporative cooling that makes the moisture colder than nearby surfaces. However, if the moisture isn’t evaporating at a high enough rate, you won’t see it on the thermal imager.
Moisture meter maxed out below window
Moisture meter maxed out on water-stained baseboards near door
Using a thermal imager to observe potential moisture inside of a wall
Seeking Professional Help
When in doubt, it's wise to consult a mold inspector or an expert. Basic mold testing, such as air or wall cavity samples, can provide some clues.
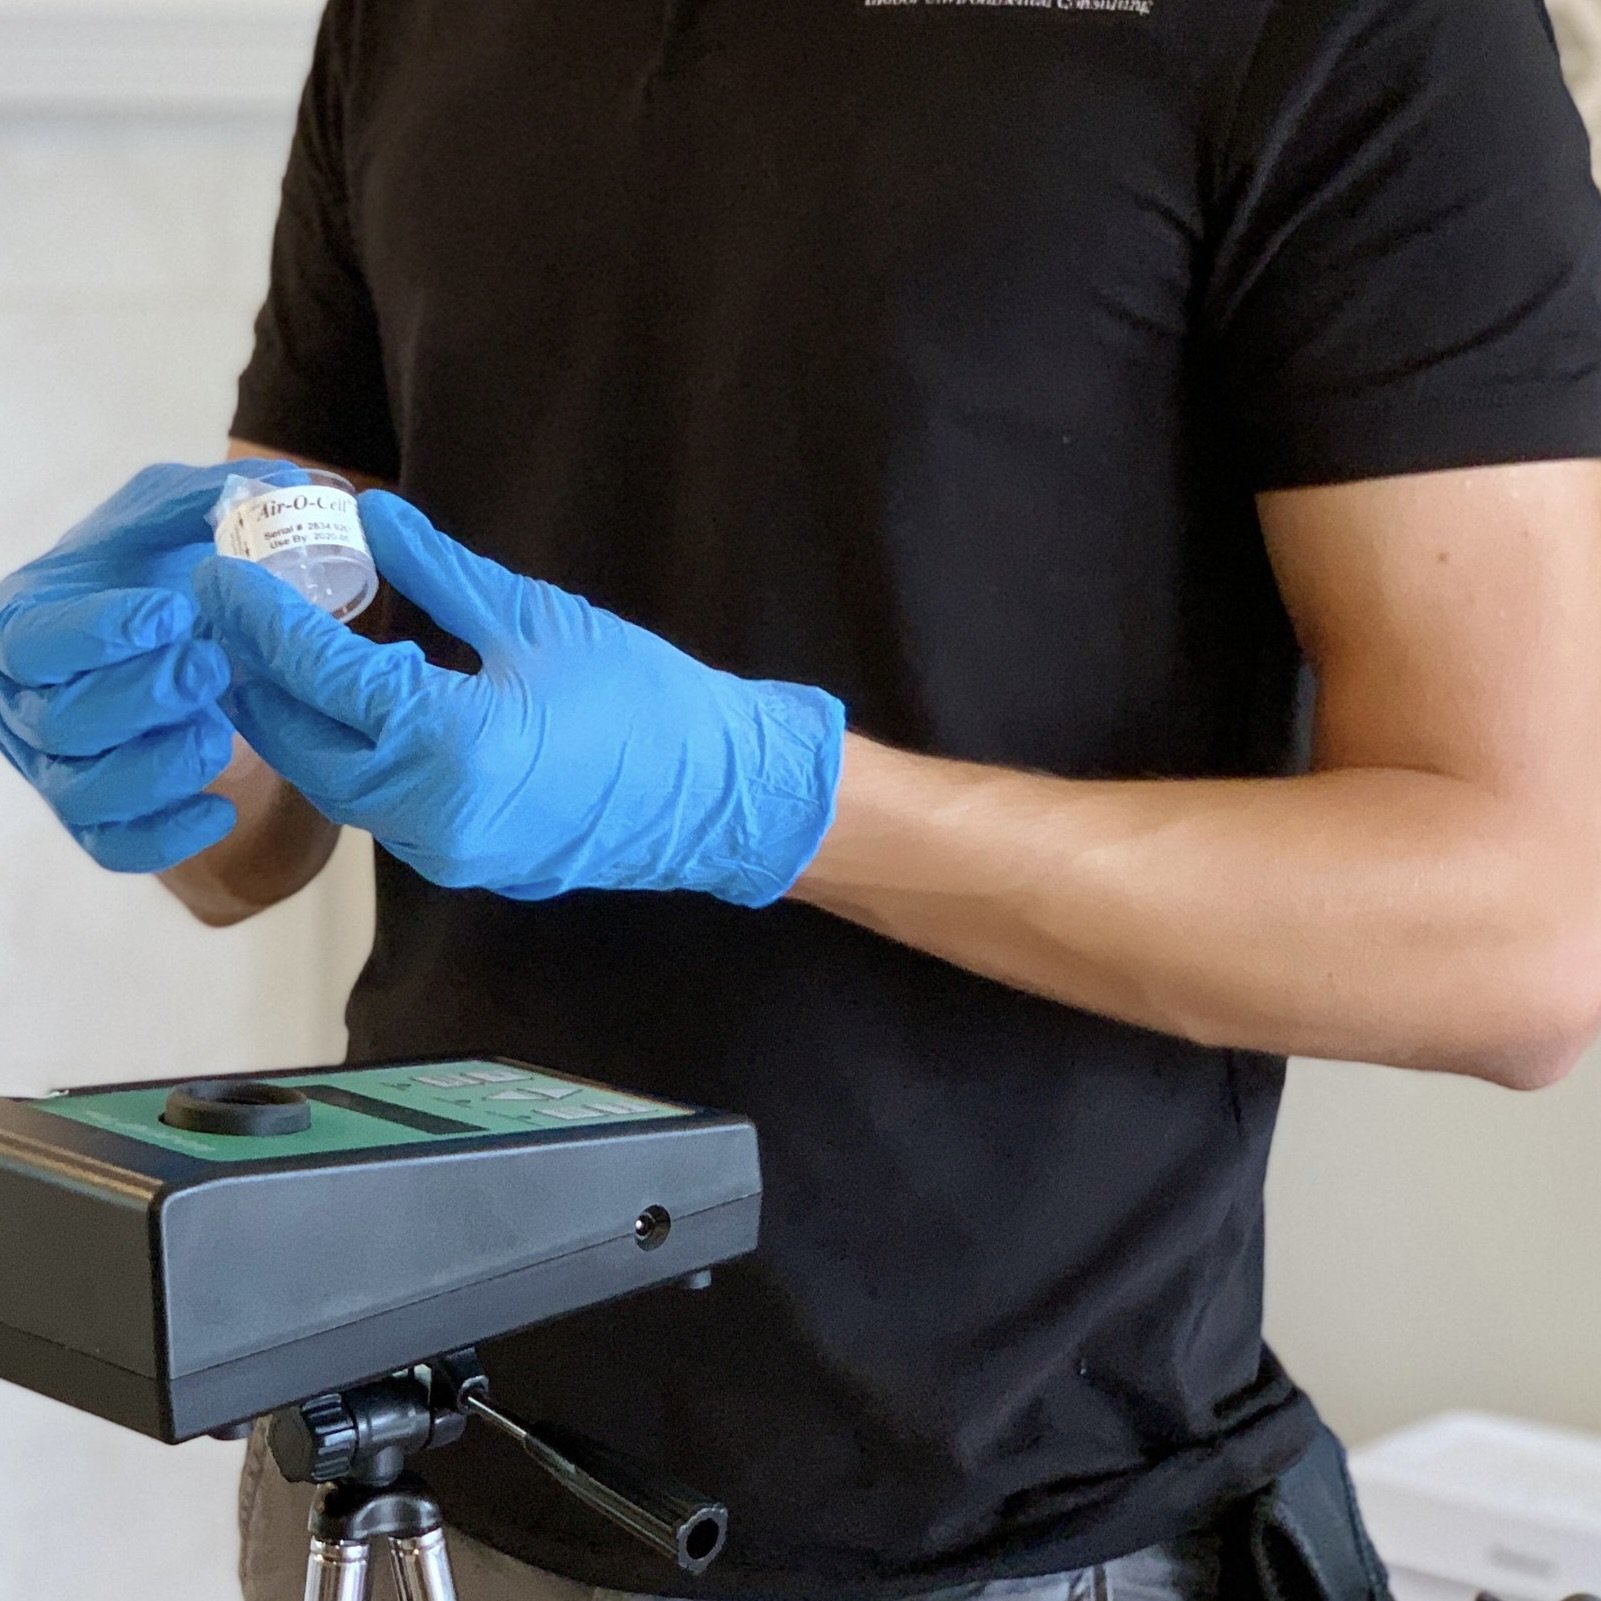
Air samples consist of using a pump and cassette to suck in mold spores from the ambient air in the room where the suspected contaminated walls exist. This of course doesn’t always show a problem if the mold in the wall isn’t contaminating the room at the time of the assessment. This is why a good mold inspector will perform “aggravated sampling.” This is where they slightly disturb things in the room (such as rustling clothes, opening and closing drawers, fluffing pillows, etc.) in order to disturb and re-suspend dust to be captured by the air sample. This gives a better idea of what has been settling over time and is a more accurate representation of how you may use the room.
Wall cavity sampling consists of the mold inspector taking their air pump and installing a tube on it to be inserted directly into the wall. There are many issues with this practice, and it can be unreliable. For example, if the tube is stuck directly on a piece of drywall or in a bay of the wall that does not contain mold growth, then it may show negative results, giving you a false peace of mind. However, if the tub happens to hit just a tiny area of mold, then it will give you astronomical levels in the mold report, making you think you have a more serious problem than you do.
Needless to say, these testing methods can be misleading. A true mold professional will take a comprehensive approach, considering the building as a whole. This holistic evaluation can uncover building issues that would contribute to moisture accumulation and mold growth in the first place.
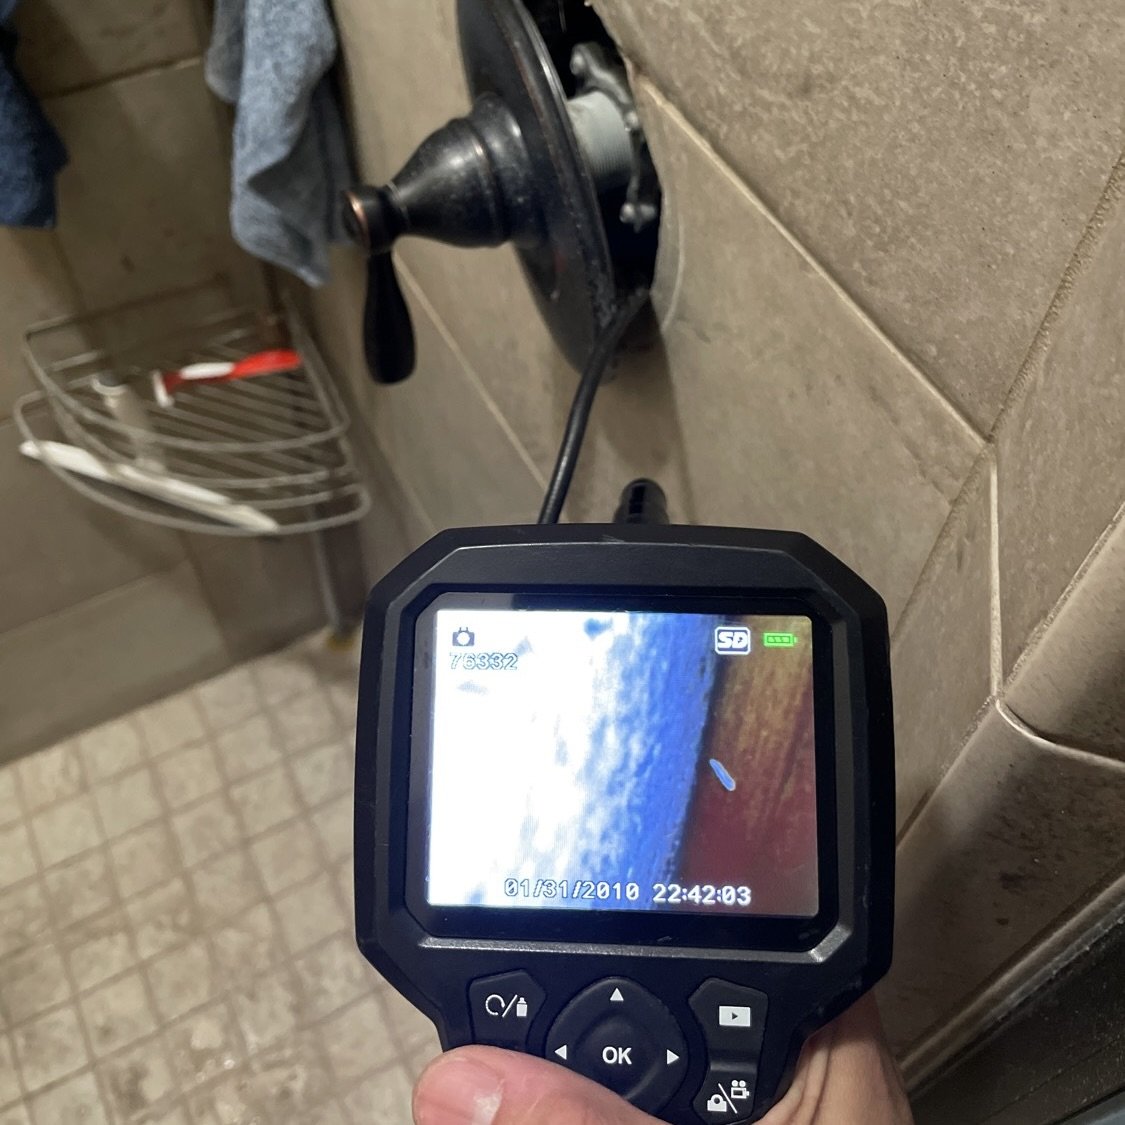
A mold inspection professional may decide to use a tool called a borescope. It is basically a camera on a long, bendy tube. A small hole is drilled in the wall, and the camera is inserted. This is about as close as you can get to knowing definitively if mold is in the wall. However, just like all testing methods, there are some limitations with borescopes, as well:
- You still need to be intrusive and damage the wall, unless you can make your way through a light switch socket, etc.
- It is difficult to navigate the camera on a bendy pole to see where you want in such a tight space.
- The camera quality is poor. It’s hard to make out what you’re seeing sometimes.
- It can’t reliably be used on exterior walls (where most moisture issues exist most commonly) since there is insulation in the wall, blocking navigation and vision.
- Inside of walls are stud bays that are usually 16” apart. This means that you can only see 16” wide at best, unless you want to drill more holes.
Some sexy guy (I think his name is Brantley) taking air samples
A borescope being used to see behind a shower wall
A borescope being used to look between a cabinet and a wall
When in doubt, take it out!
The only surefire way to confirm mold presence is to remove a portion of the wall. Drywall is relatively inexpensive, making this a viable option for investigation. However, if you discover mold during the removal process, be prepared with plastic and tape to seal the area until repairs can be made. I personally like to do the pumpkin carve method in the drywall so that I can plug it back in for it to be repaired. Doing inexpensive cutouts with plaster, concrete, or brick walls isn’t possible, and they prove to be even more challenging for investigation.
Suspected air infiltration issue led to performing a cutout
Mold growth found inside of the wall; was immediately sealed back up
Conclusion
While definitively determining mold presence within walls without invasive measures remains a challenge, you're not without tools to infer its potential existence. By addressing moisture sources, observing visible signs, using your senses, employing moisture meters, seeking professional assistance, and taking action when in doubt, you can make informed decisions to protect your home and your health. Remember, prevention and early detection are key in the battle against mold.
About The Author
Brantley May is a Building Scientist and Council-Certified Indoor Environmental Consultant with a specialty in Mycology and certified by the McCrone Research Institute and the Oshner Medical Center for the examination and identification of fungal spores and pollen via microscopy.
Brantley is certified by the Building Performance Institute as a Building Analyst, Building Envelope Professional, and Infiltration and Duct Leakage Expert. Brantley also holds several certifications related to the identification of Mycotoxins, Water Damage, Odor Control, Structural Drying, Infectious Disease Control, and Energy efficiency issues and is a student of Mechanical Engineering.
He is also a state-licensed mold assessor who carries the credentials for teaching and proctoring exams for other professionals to receive their state accreditations and certifications in mold and environmental-related services.


